Upload and manage multi-level databases with Weever's new Database Manager.
Whether it's assets, products, teams, parts... you name it, these belong in Weever's Database Manager. Upload your large datasets right into Weever, then your users can select from these options when submitting their forms. Stop building the same fields over and over - just build them once and add that database to your forms.
Don't have Database Manager? Contact the customer success team to learn more!
Follow these easy steps to build your databases in Weever.
STEP 1: Build your database
- Select "Database Manager" from the menu. Here you will see any databases already in the system, as well as the locked "Assets" database.
The "Assets" database is where you will manage your asset hierarchy now. This has replaced "Asset Management"
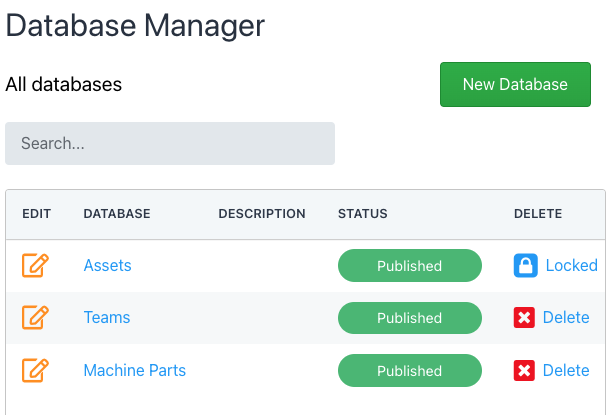
- To add a new database, tap the green button

- Give this database a name and then add names for any levels of hierarchy needed. In the example below, we added labels for 2 levels, so a database with 2 levels will be created. Your database can have as many as 5 levels.
- Optionally, you can add up to 2 properties to each level. These custom properties can be used to search your database, or to link to other systems like SAP.
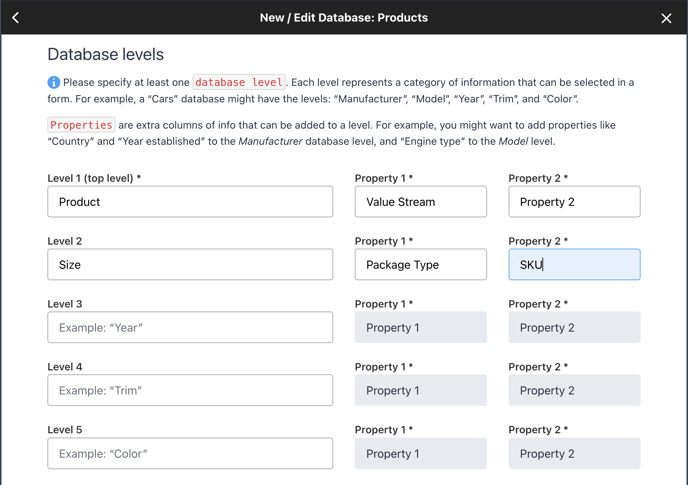
- When you're ready tap the Save Changes button.
STEP 2: Upload your data into your new database
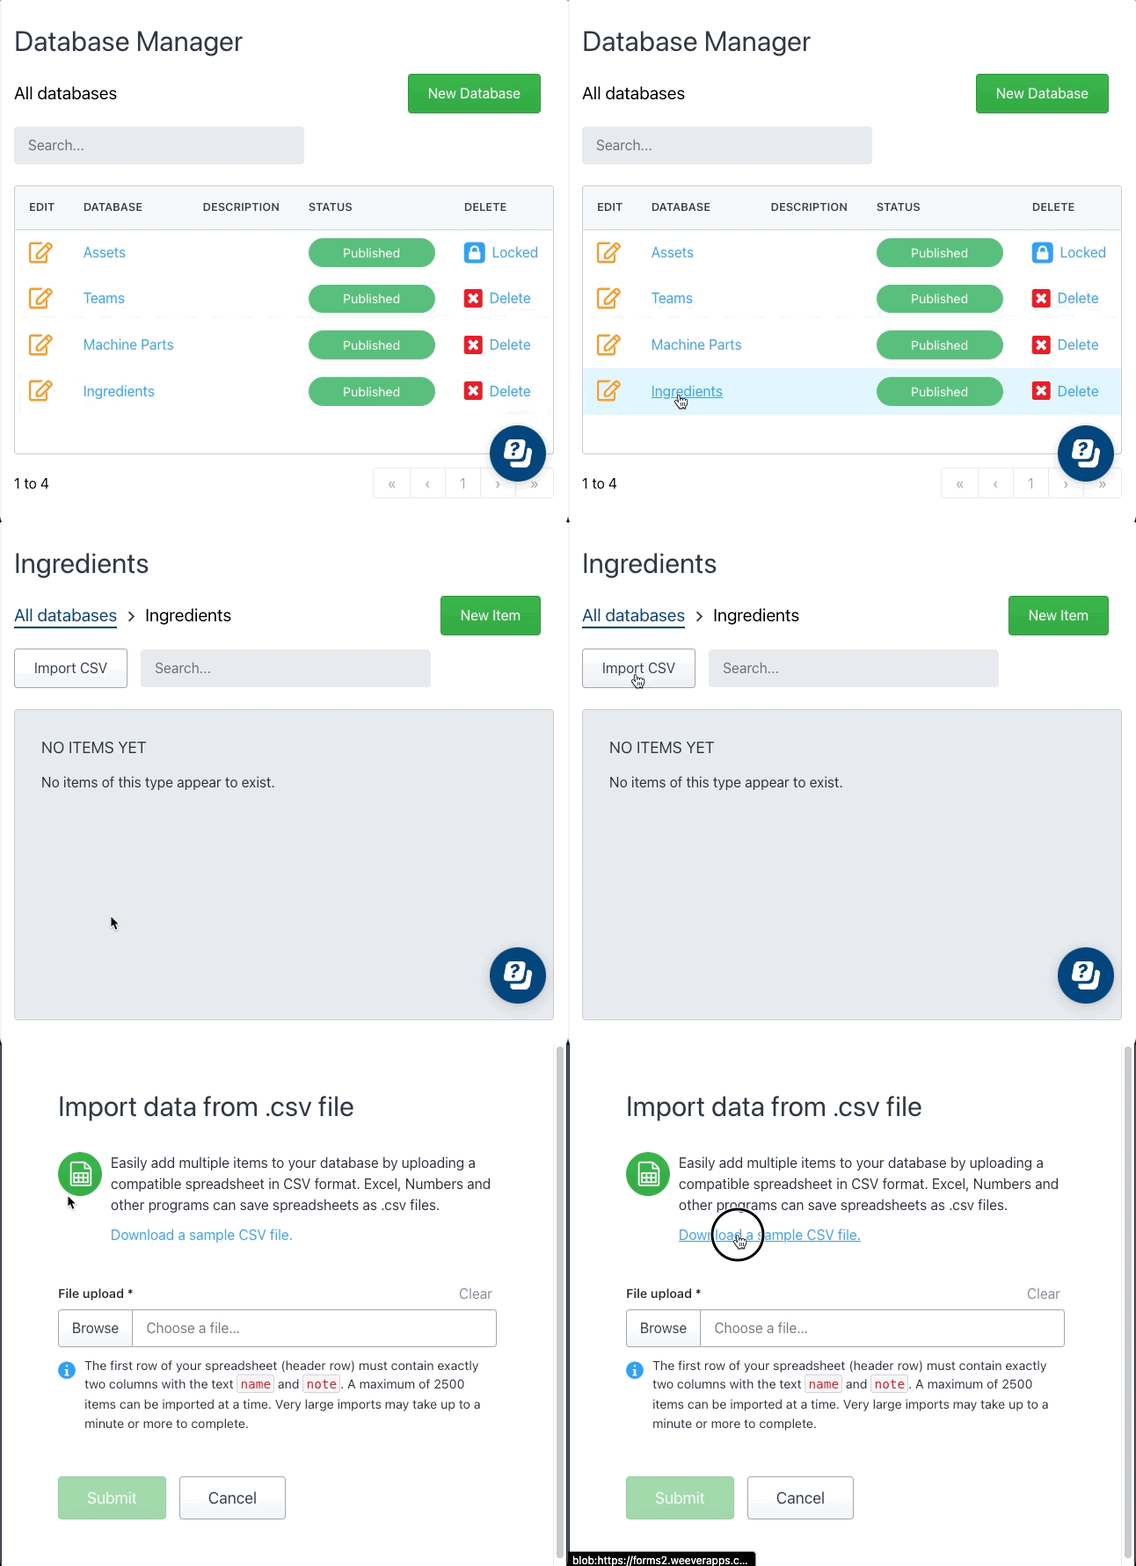
- Click the database you would like to add data to, this will open the top level of your database.
- To add your data manually, tap the
 button to add an item to your database.
 - To easily upload your data, tap
 .
. - Download the sample CSV to your desktop and build our that level of your database
NOTE
The first row of your spreadsheet (header row) must contain exactly 4 columns with the text name, note, property 1, property 2 . A maximum of 2500 items can be imported at a time. Very large imports may take up to a minute or more to complete.

- Select Browse and find the CSV file you want to upload on your device. You will be shown the up to the first 10 rows of the CSV for a quick review. Then click submit when you are ready and your data will be uploaded.
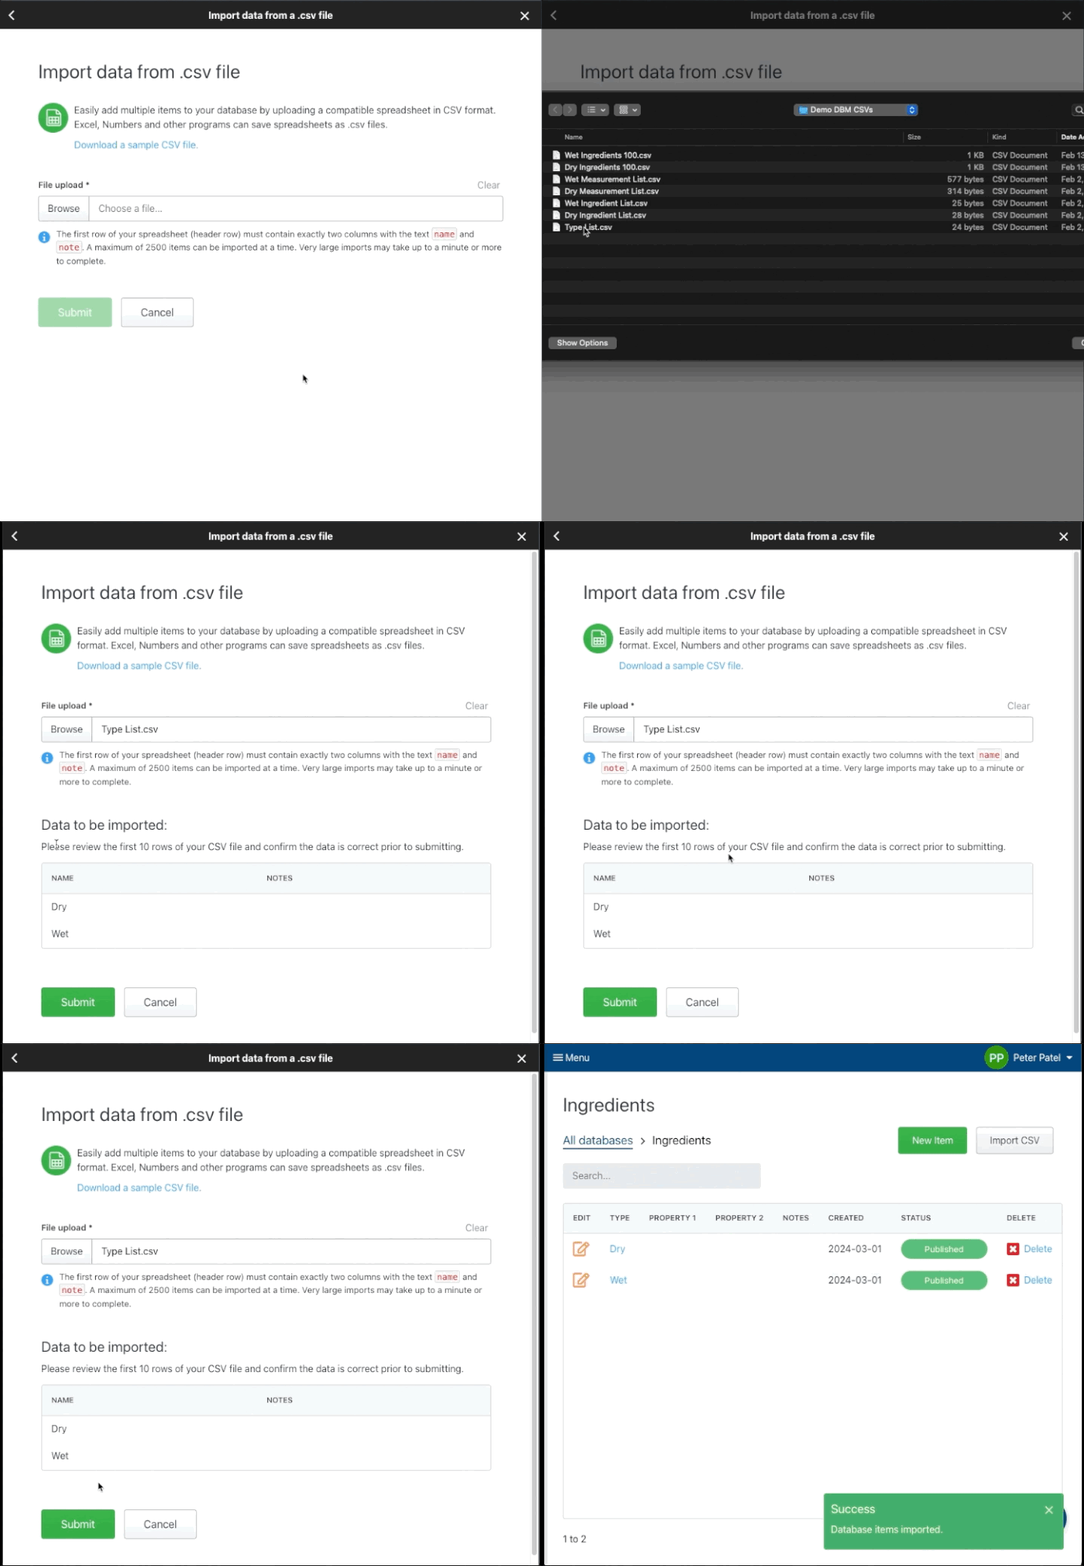
- To add data to another level of hierarchy, select the item you'd like to add data too.
- In this example, I will add a larger list of dry ingredients.
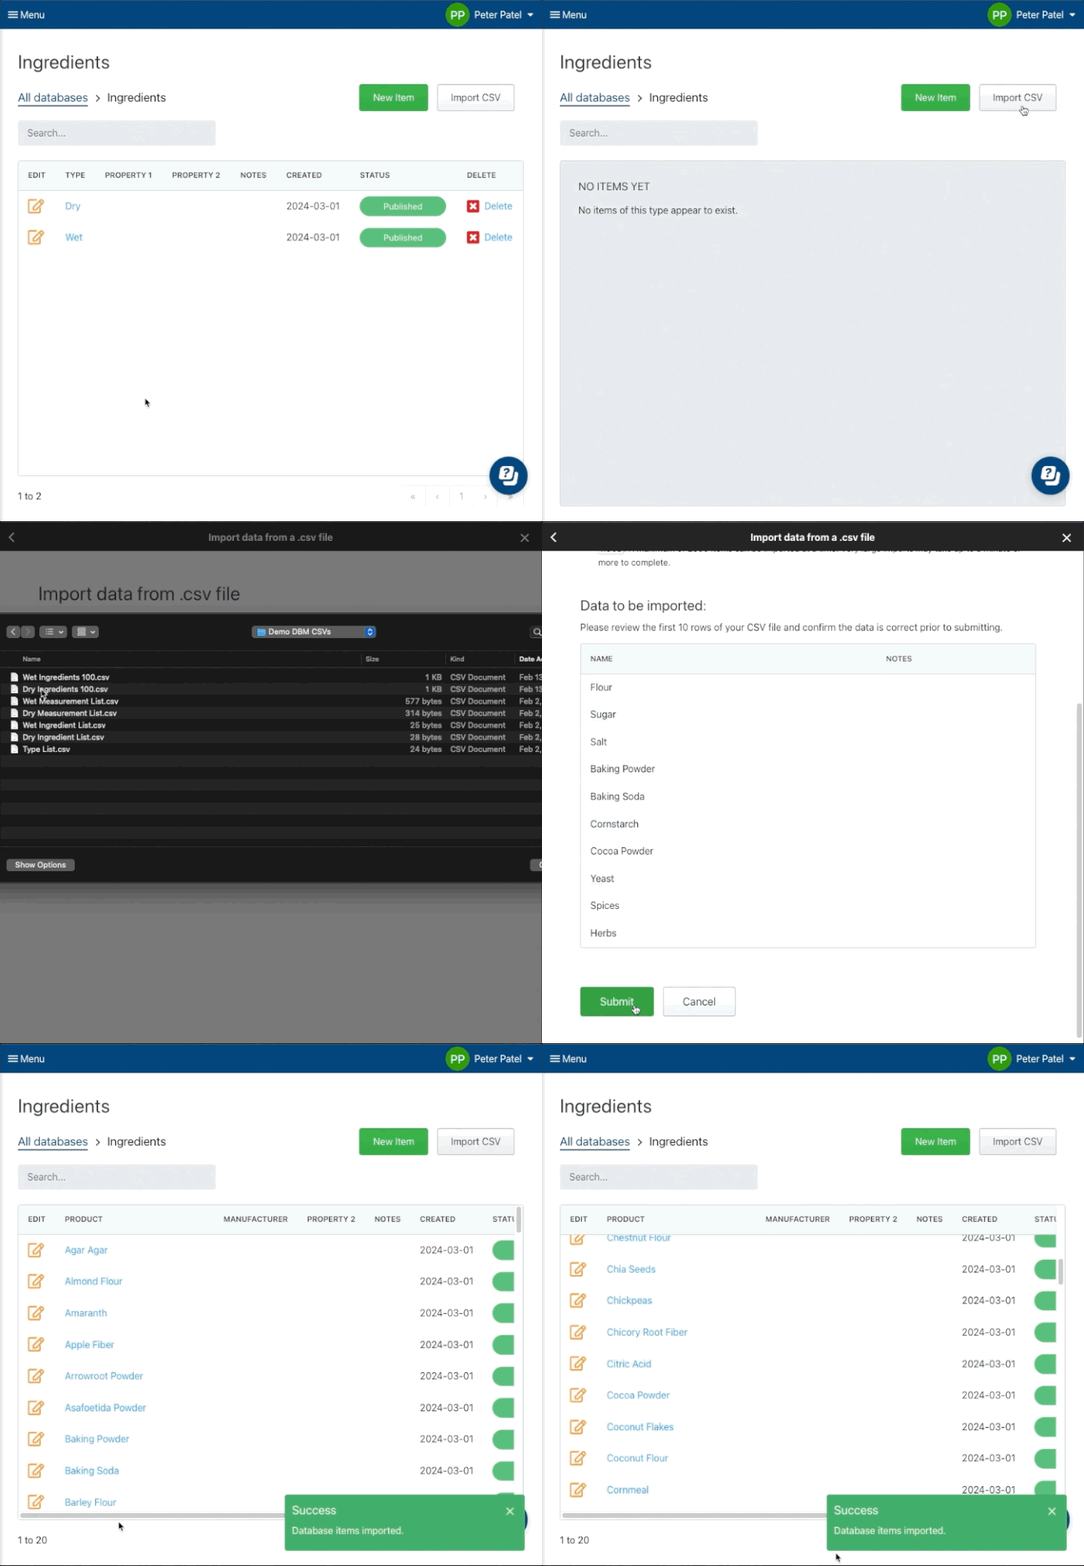
- Now, repeat the same process for the remaining levels and properties in your database!
STEP 3: Add the Database field to your Forms
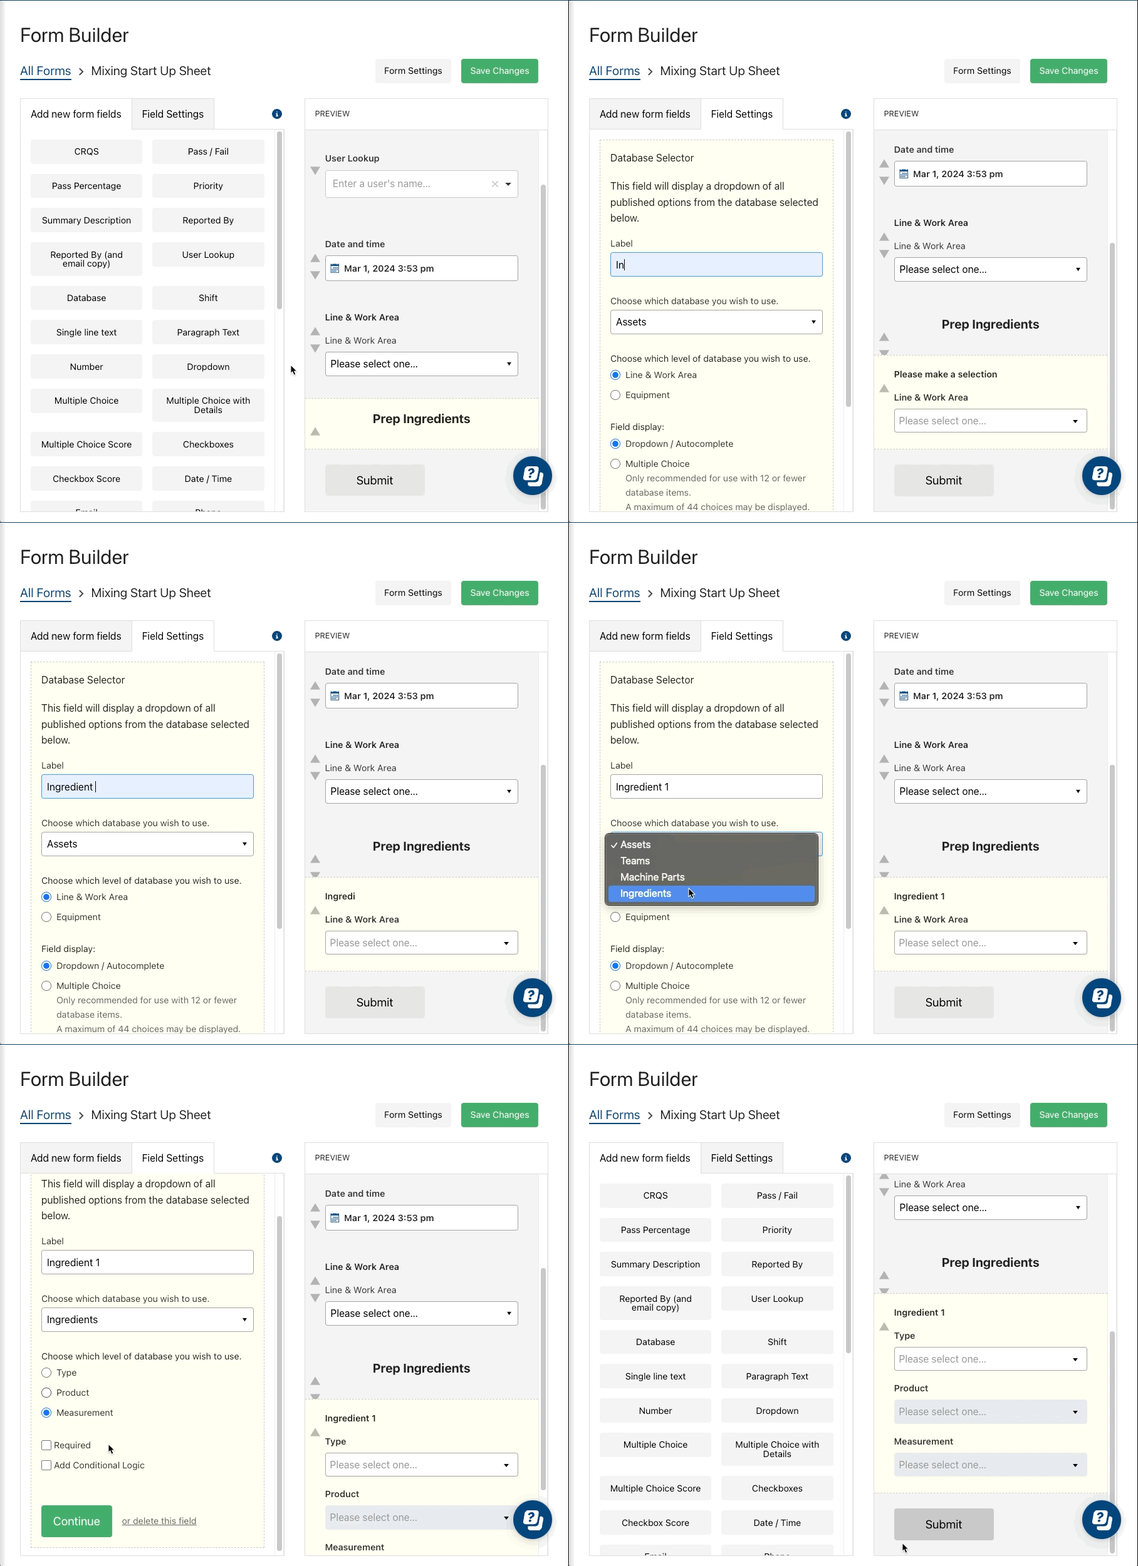
- In the Form Builder, select "Database" from the list of fields
- Add your label, then select which database from the dropdown you'd like to draw from.
- Choose what level you would like to drill down to and then you are ready to go.
- In this example, I can add as many ingredient fields as needed using just one database!
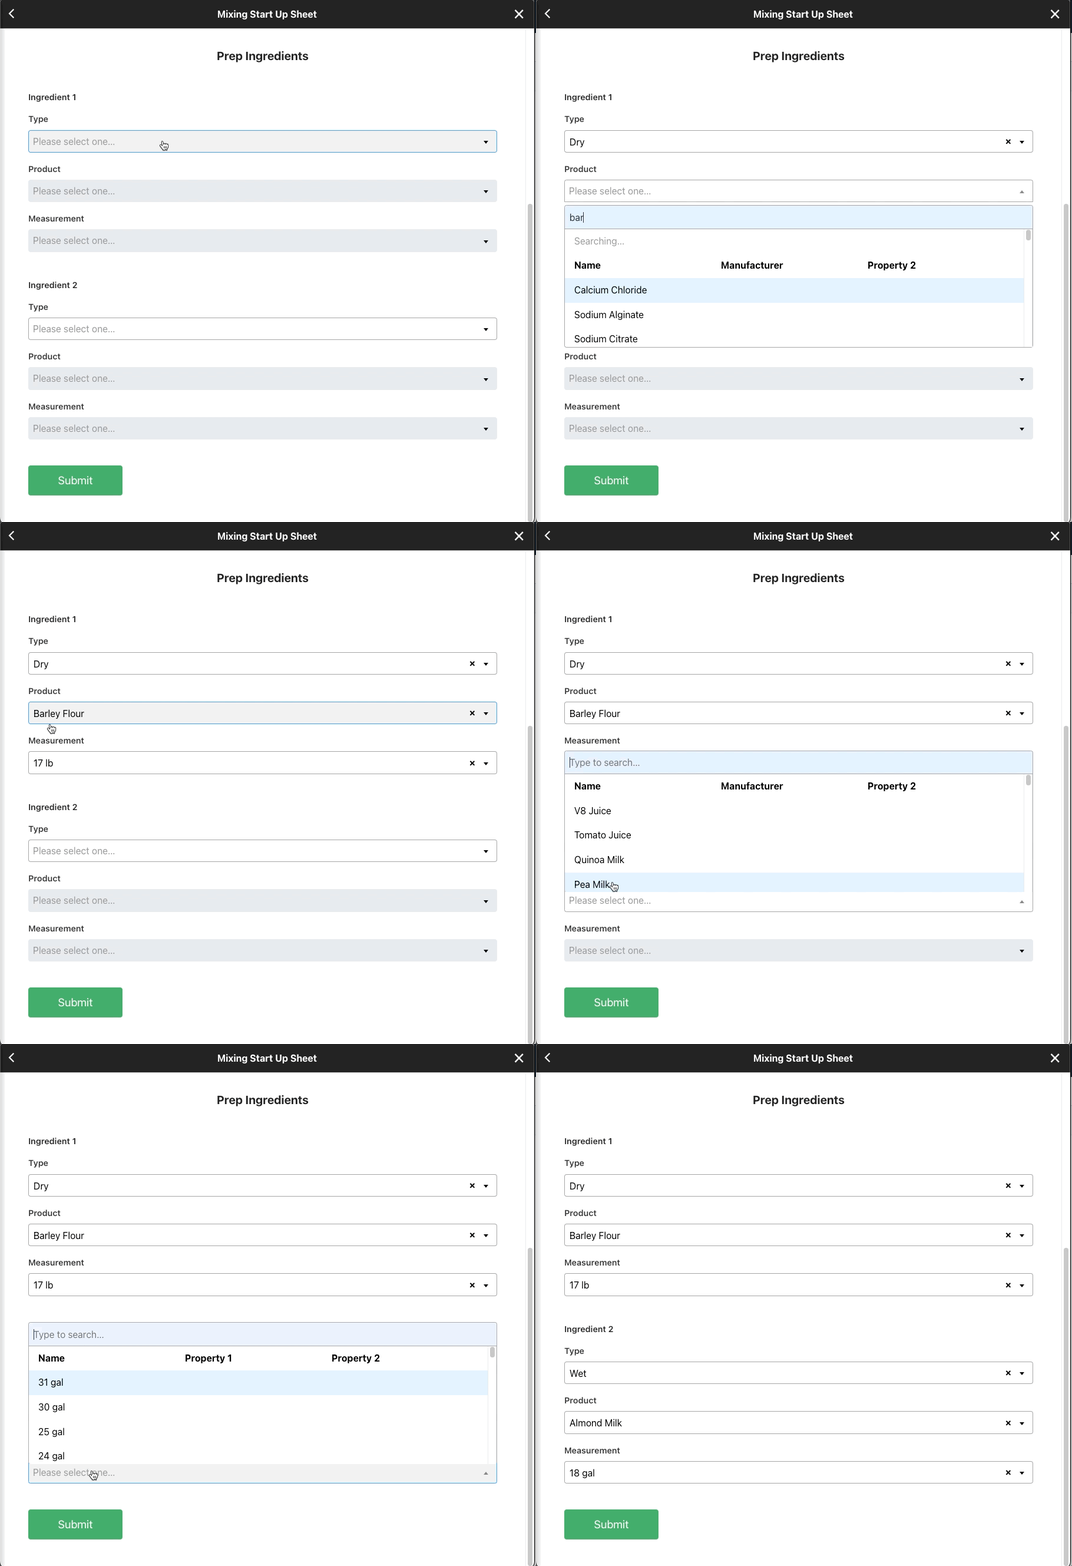
How it looks on the Form
- Users can search within each drop down to prevent endless scrolling, and as mentioned before Properties will also be searchable within drop down lists.
Use OCR scanning (text scanning) to auto fill the dropdown search field and find items quicker!
In the example above, if I were to have the container of Almond Milk in front of me, I could scan the word Almond instead of typing it, to find it amongst my list.
View this article on OCR scanning for information on how to perform this action.
And that's it!
Now you can add the "Database" field to your forms, and it will pull from the data you just added in Database Manager.
FAQ
What happens if I delete a database?
Nothing. Your historical data will remain the same. You will need to remove the database from any forms that are referencing it before you can delete it. This is a safeguard to minimize the chance of operational disruption due to changes to your database.
How can I edit the levels in my database?
You are able to edit the custom properties for each level of your database, but you can't edit the labels of the levels or add/remove levels in an existing database. If you would like to change the number of database levels or their names, just delete that database and make a new one.
