How do I make folders and subfolders for my forms?
Keep your forms list organized with folders and subfolders

Adding folders and subfolders is easy in Weever. This can be done in Form Folders and is available to administrators only. To add a new folder or subfolder follow these simple steps:
STEP 1 - Creating top level folders
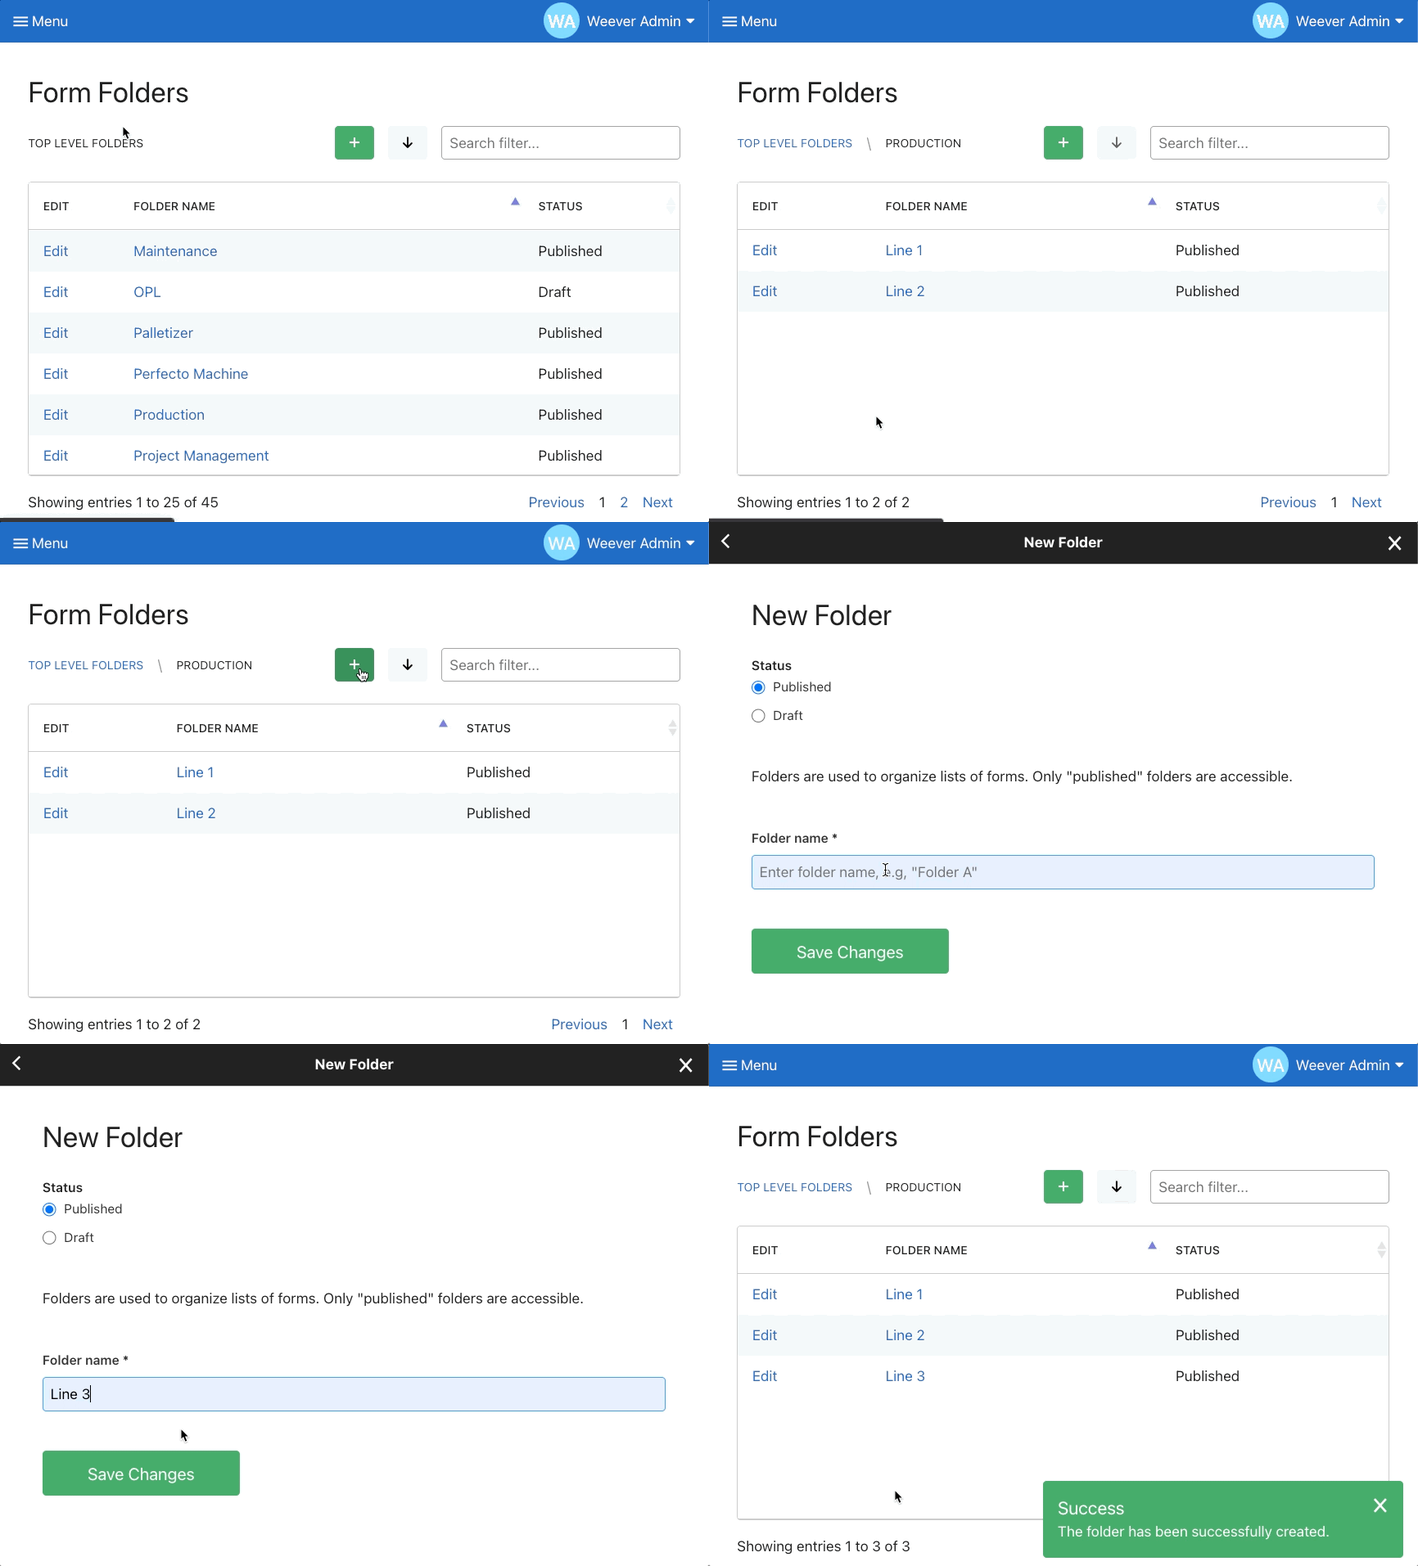
Navigate to Form Folders from the menu and tap the New Folder button  to create a top level folder (if you don't already have one). Fill out the name of your top level folder and tap Save Changes. You can add as many top level folders as you would like.
If you set a folder (or subfolder) to "Draft" then that folder will no longer show in the Forms page of Weever. All the forms in that folder (and subfolders) will also not show in the ALL FORMS list if the folder is set to draft.
STEP 2 - Creating subfolders
Tap the name of a top level folder and you will be navigated to the level below. Now you can add subfolders by tapping the New Folder button, filling out the Folder Name field and tapping Save Changes.

Tip!
You can create up to 3 levels of nested subfolders under your top level folders. Do this by tapping your subfolder name and following the steps in STEP 2 again.
STEP 3 - Moving forms to your folders or subfolders
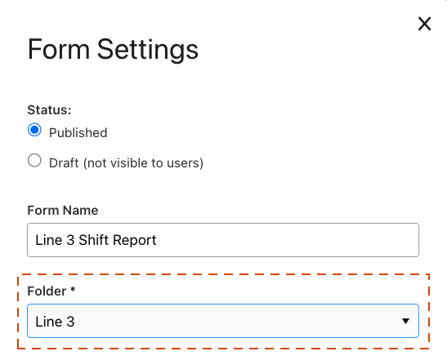
Now that you have added your folders and subfolders, you can move your forms to your folders or subfolders in Form Builder. Do this by tapping Form Settings in Form Builder, choosing the folder or subfolder name in the Folder dropdown, and tapping Save Changes.

And that's it!
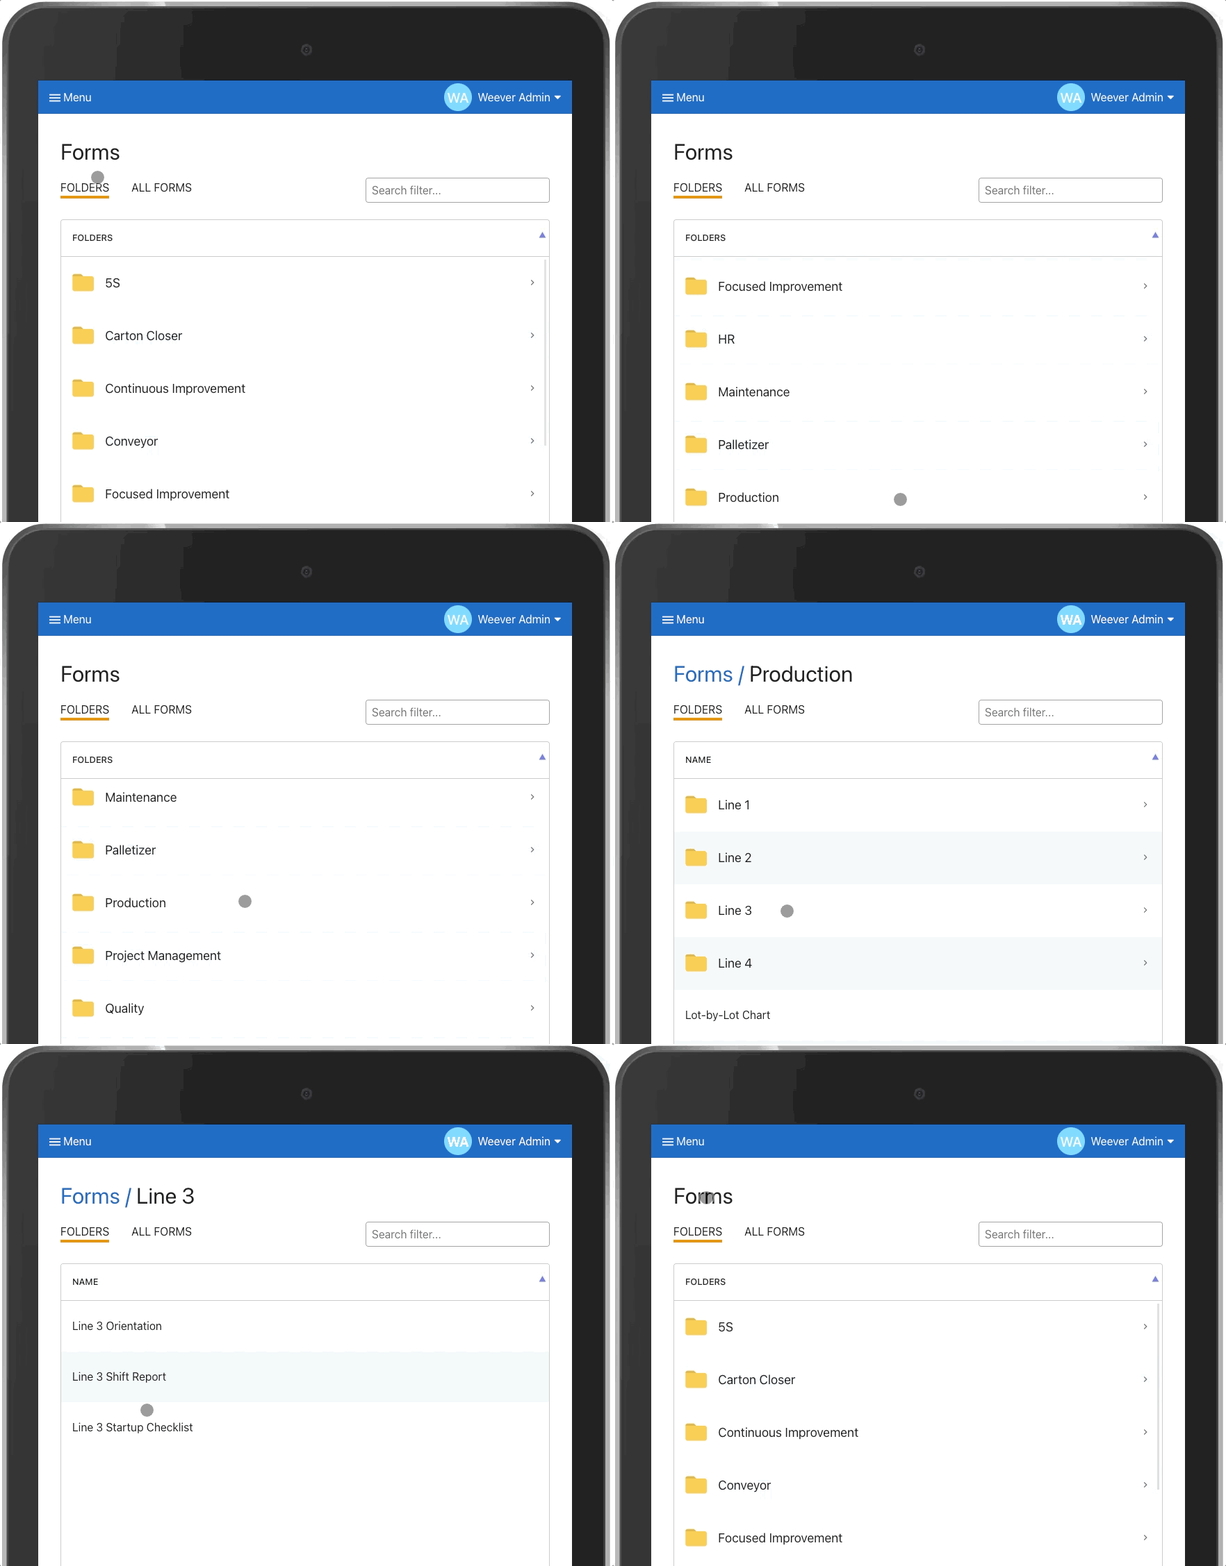
Now your forms list will be organized with your new folders and subfolders so your users can easily find the form they are looking for.
Note!
Users will also be able to search the ALL FORMS list for your form even if it is in a nested subfolder.