Avoid overdue inspections on days where the shifts are not working with the new upgraded Inspection Shifts feature. This new feature allows you to add your shifts and include important information like the start and end time, as well as the days of the week that shift is scheduled. This prevents this shift's inspections from being scheduled on days that they are not working.
Follow these steps to set up your shifts:
Step 1 - Add new shifts
Navigate to Inspection Shifts in the Inspections module
NOTE
There are two pages in Weever to manage add your shifts. This article covers Inspection Shifts in the Inspections module.
Tap "New Shift" to create a new shift. Then fill out the fields in the form.
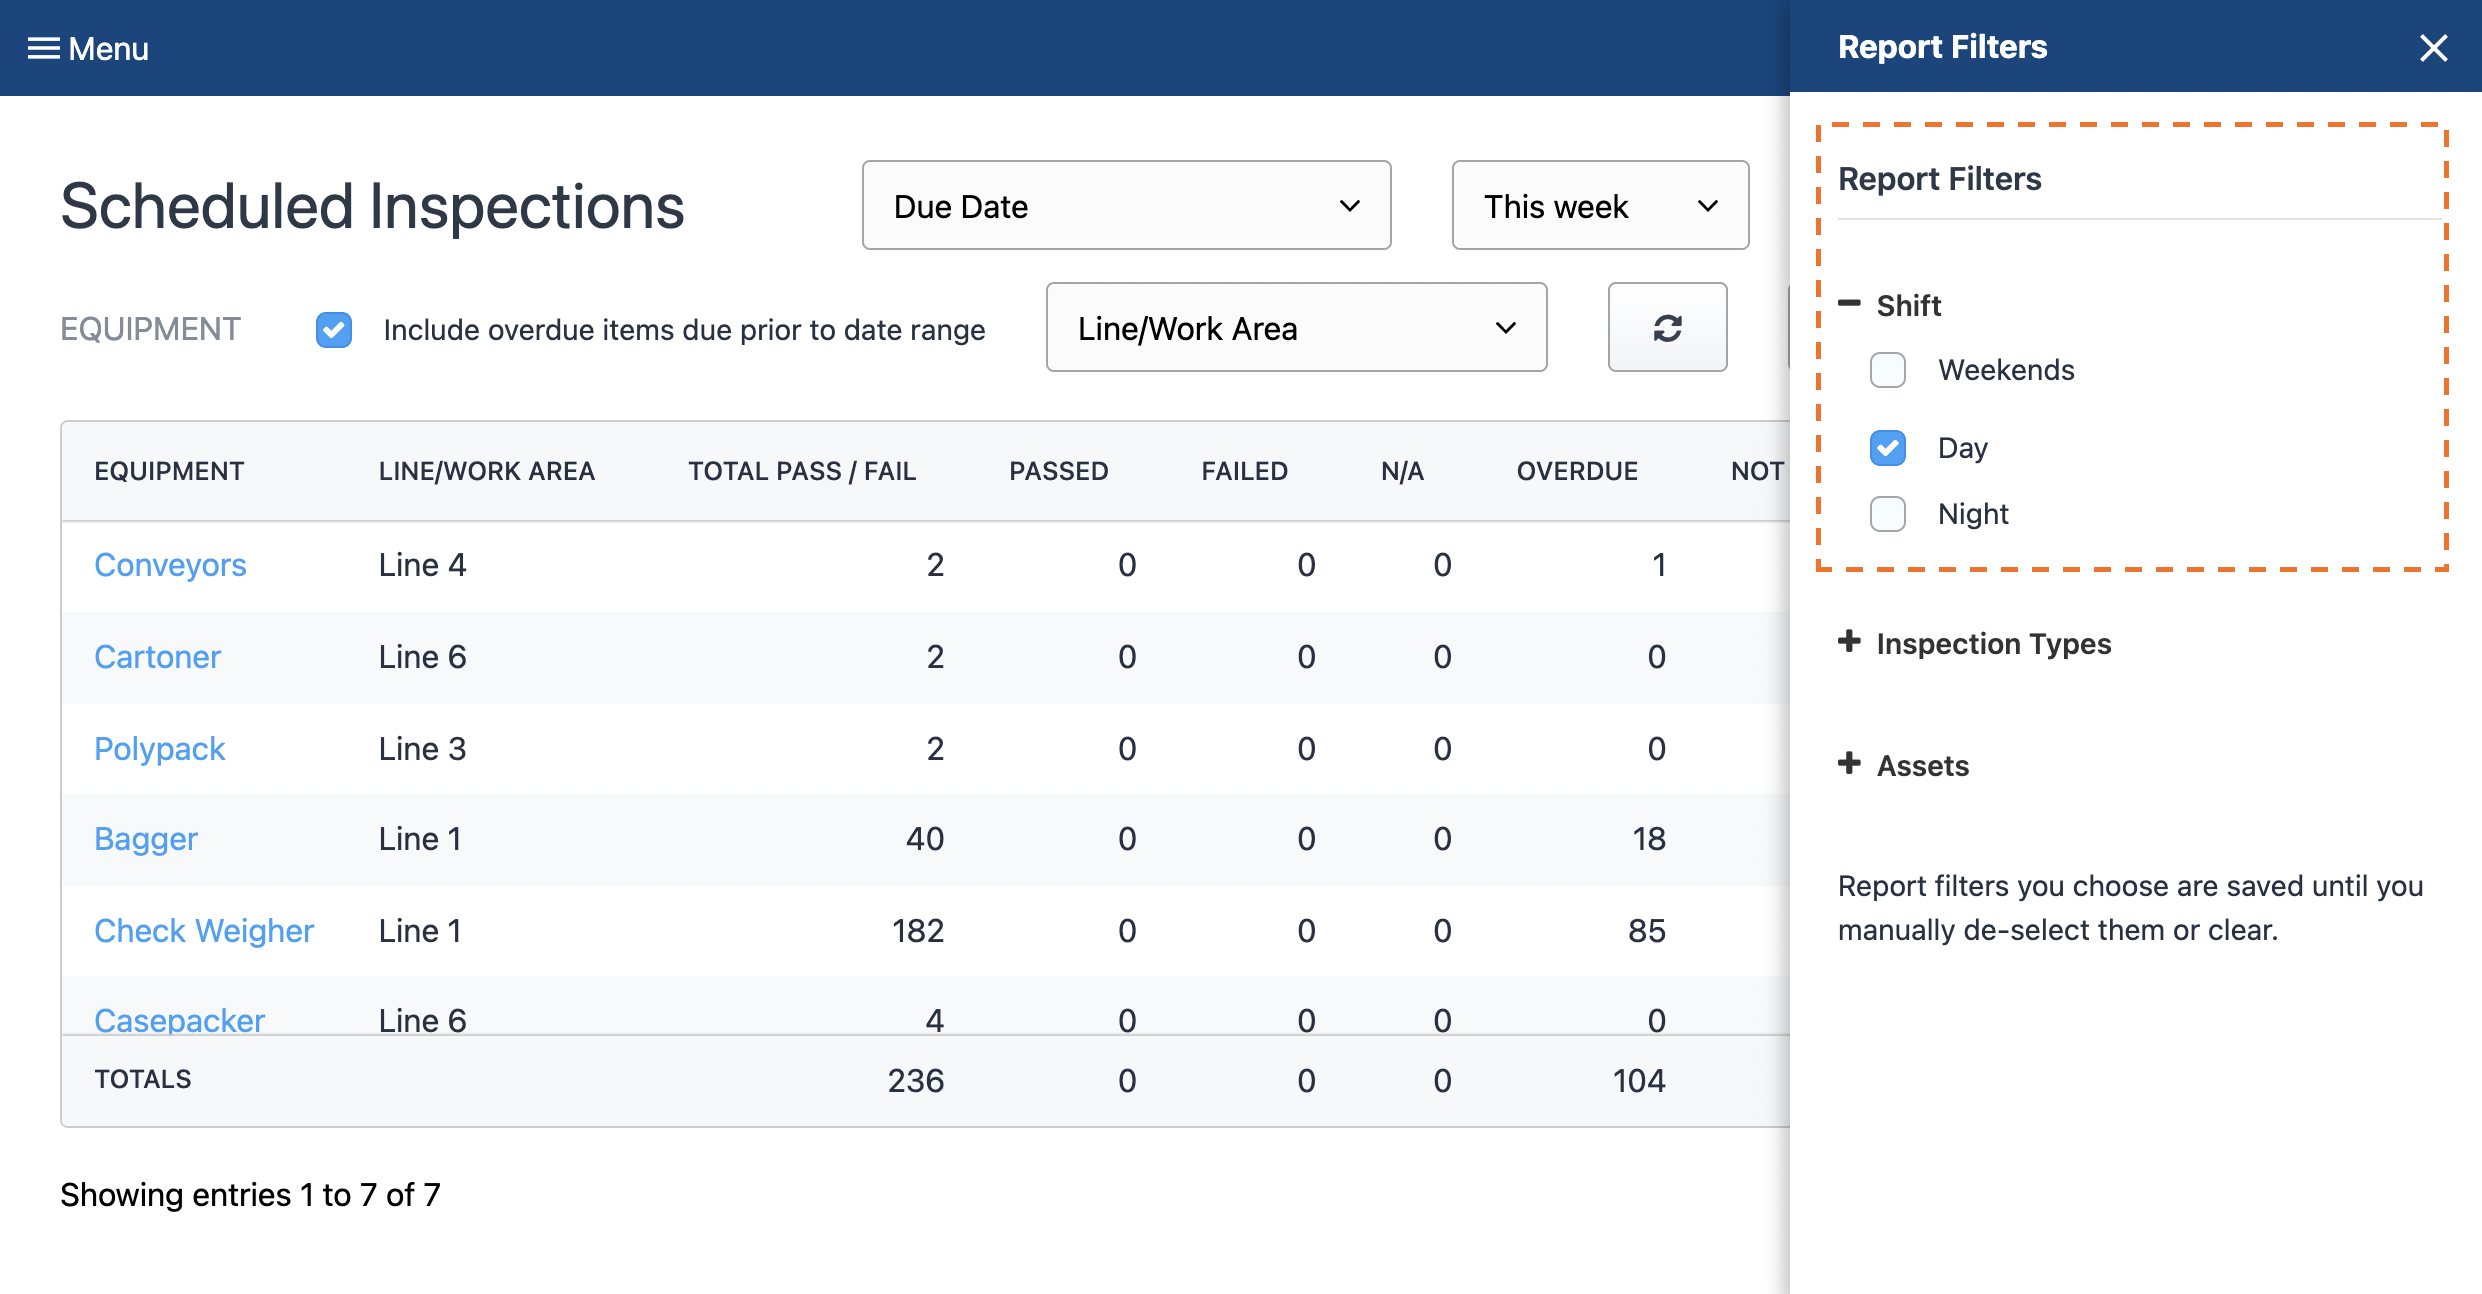
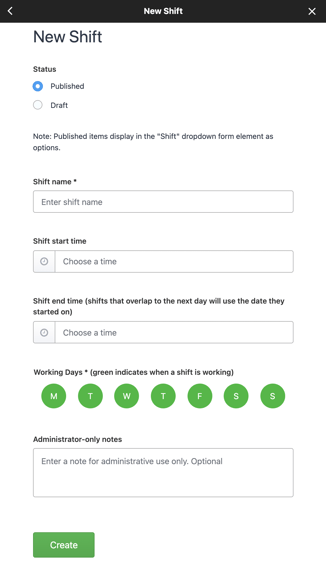 Status - If you set the status to Draft, then this shift will not show as as option when building new (or updating existing) inspections in Inspection Builder. It will also hide that shift from the filter panel in Scheduled Inspections. Inspections that are already scheduled for that shift, however, will remain in Scheduled Inspections.
 - Name - Add the name of your shift (ie. Day)
- Shift Start Time - Add the time of day the shift starts
- Shift End time - Add the time of day the shift ends. ⚠️The end time of your shift is the time your inspections are due by. If you want your users to complete their inspections earlier in their shift, you can update this to be earlier in the day. ⚠️If you don't add shift end time the inspections will be due by midnight.
- Working Days - Choose the days of the week this shift works. If your shift spans 2 days (ie. 7 PM - 7 AM) choose the day that the shift ends on.
Tap "Create"
Step 2 - Edit or delete shifts (if required)
Tap edit ![]() beside the shift to edit it at any time. Any changes you make will be reflected in Scheduled Inspections and Inspection Builder. This includes the shift name, working days (which would add/remove scheduled inspections to reflect the new working days), as well as the end time (which would update when the inspection is due by).
beside the shift to edit it at any time. Any changes you make will be reflected in Scheduled Inspections and Inspection Builder. This includes the shift name, working days (which would add/remove scheduled inspections to reflect the new working days), as well as the end time (which would update when the inspection is due by).
You can delete a shift by tapping the "Remove" button  .
.
CAUTION
Removing a shift will remove any inspections in Inspection Builder or Scheduled Inspections associated with that shift. This would not, however, delete any forms or submission data for inspections completed by that shift.
Step 3 - Build Inspections for that shift
Schedule inspections for that shift by navigating to Inspection Builder. Either create a new inspection, or edit an existing inspection. Then select your new Shift in the "Shift" checkbox field and tap "Save Changes". This will schedule an inspection for that shift.
If you select multiple shifts, then multiple inspections will be created in Inspection Builder. This way you can make changes to a specific inspection if you need to.
You will be able to see the shift of each inspection in the "Shift" column of the Inspection Builder view as well as the All Inspections option of the Scheduled Inspections view.
And that's it!
Now your shift will know what inspections they are required to complete by filtering the Scheduled Inspections view by their shift.