 We understand there are cases where the number of times you need to collect a certain data point can vary from submission to submission. Use this handy tip to set your forms up to collect the correct number every time!
This tip is very handy for:
- Breakdowns - Add the number of breakdowns then collect the reason for each breakdown
- Recognition Nomination - This allows you to nominate multiple users for the same achievement, all in one form.
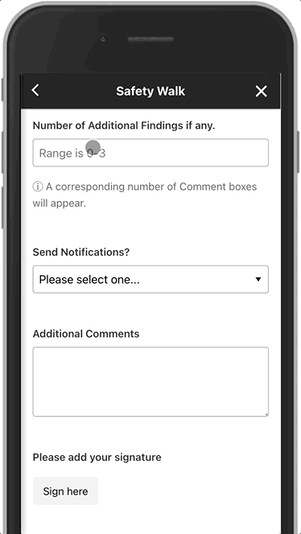
- Adding additional findings - For GEMBA walks, Near Misses, etc. This method will allow you to add the exact number of additional findings fields needed to document your data.
- And much more!
Adding too many form fields (even hidden ones with conditional logic) can result in slow performance of your browser. We recommend you keep your forms to 100 fields or less.
Follow these steps to build this into your forms:
STEP 1:
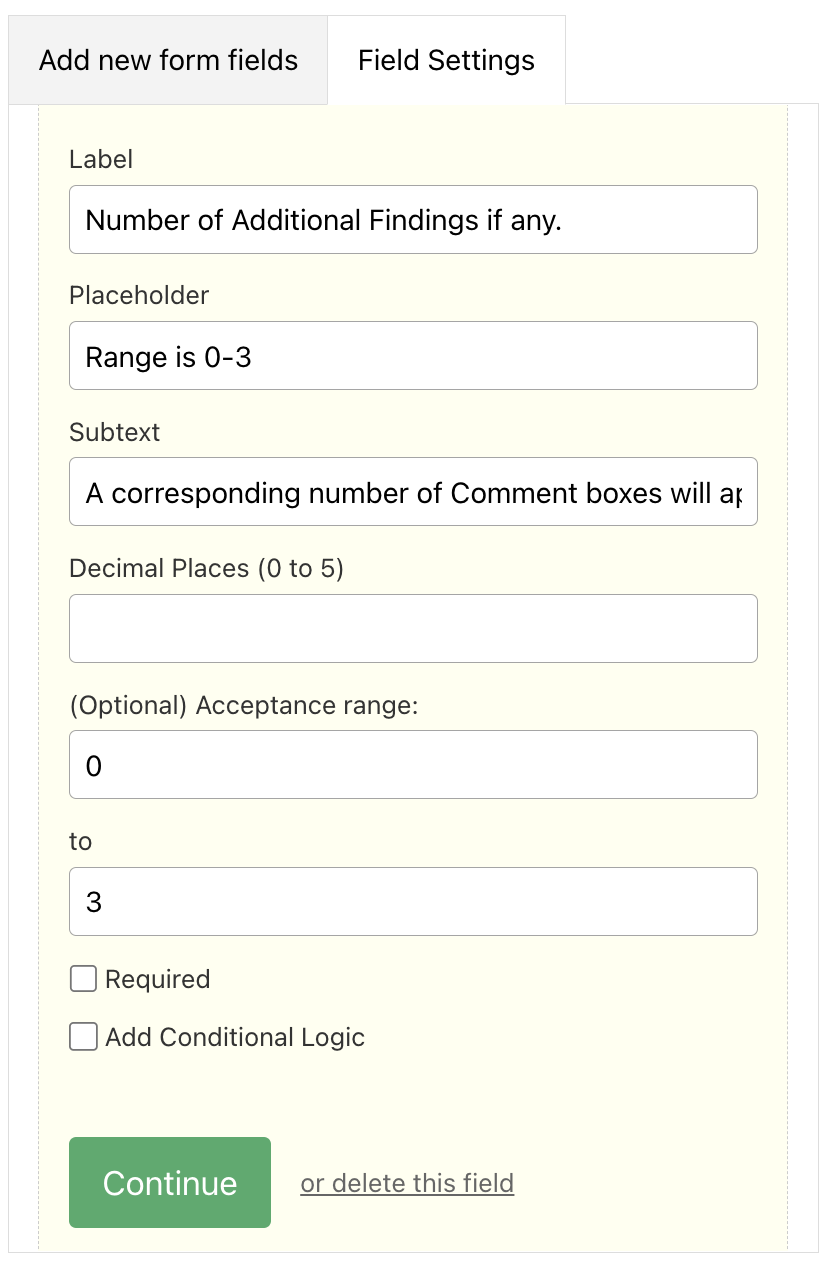
- Begin by adding a Number field and labeling it accordingly. (Ex: Number of Additional Findings)
- Add "0" to "Decimal Places"
- (Optional) Add the Acceptance Range in the Placeholder line and add Subtext to explain the function of this field.
- Ensure the Acceptance Range is set to the max number of Form Fields that would be needed to document findings. (Ex: 0-3 would allow for 3 Form Fields max to be documented)
STEP 2: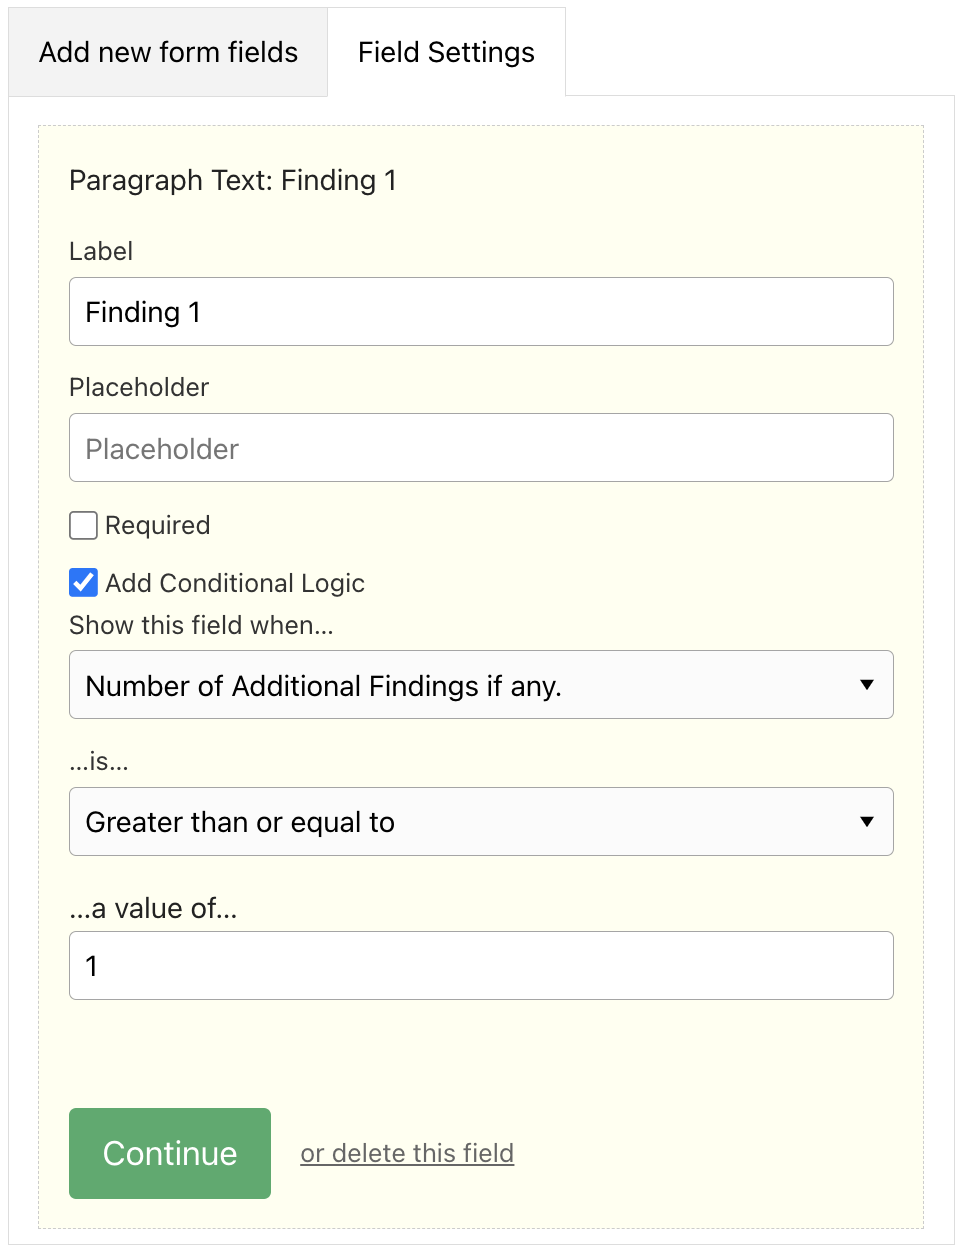
- Add your first form field that will collect your data (Ex: a Paragraph Text field to capture additional finding comments) and label it accordingly.
- Add conditional logic to this field and apply it to the number field question from Step 1.
- Have the logic show the Paragraph Text field only when the number is Greater or Equal to 1.
- This will now display one Paragraph Text field for the User to fill in when the number 1 is entered in the Form.
STEP 3:
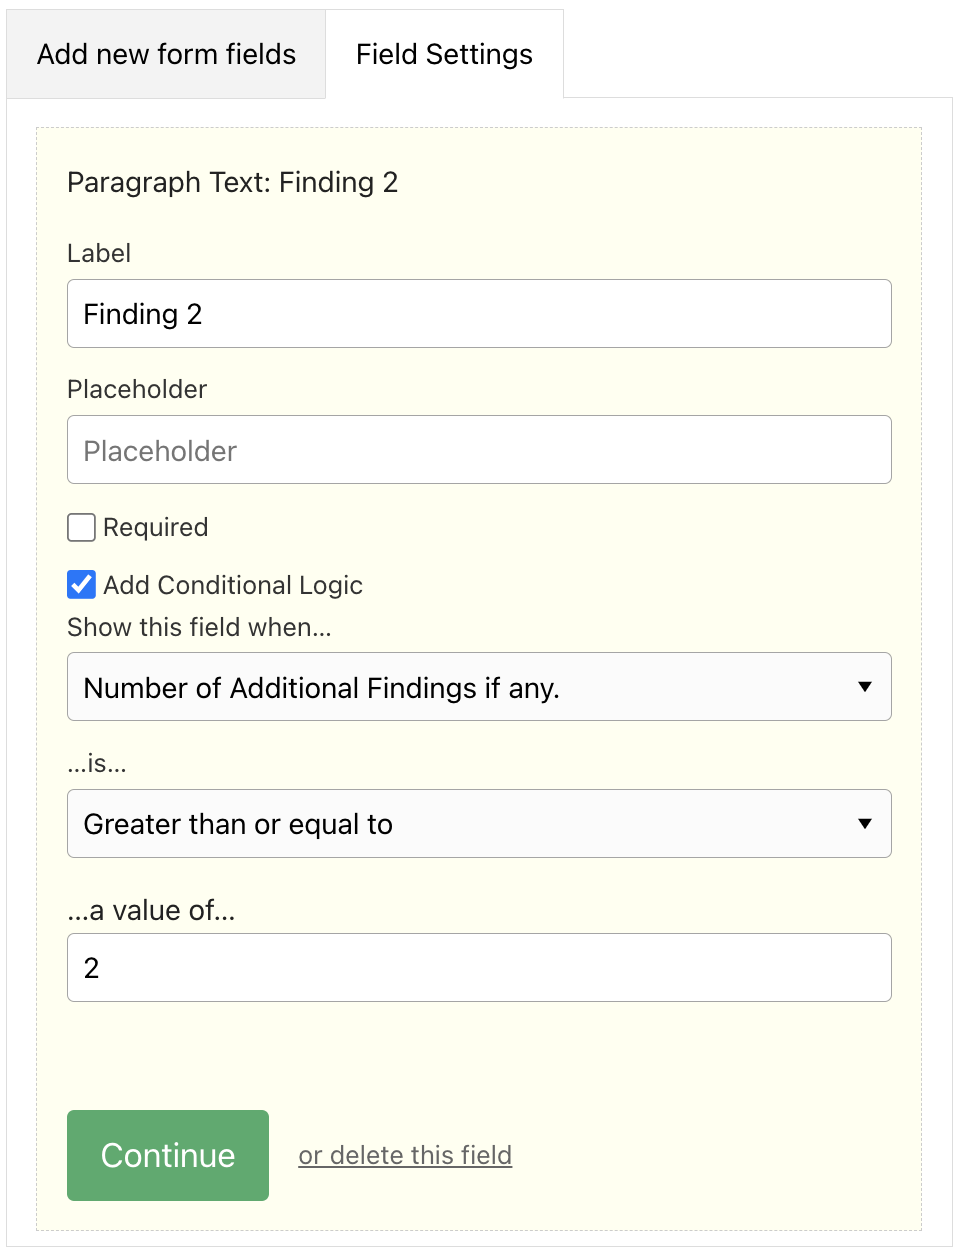
- Add the Second Form Field that will collect your data.
- As you add more additional finding fields, change the logic to display each field according to the finding number that it is. (Ex: To have two additional findings fields be displayed, then make the Greater or Equal to the value of 2, like the image to the right)
- This will now display the Findings 1 and Findings 2 Paragraph Text fields for the User to fill in.
- Repeat Step 3 for all fields that will make up the Acceptance Range in your number field. Finding 3 would have a Greater or Equal to value of 3 and so forth with the increasing amount of fields necessary.
AND THAT'S IT!
Now your users will have the space they need to collect this data point multiple times over.
Want to learn more?
This video will cover the steps needed to set up your Form. The example used in this video is for an Associate Recognition Form.