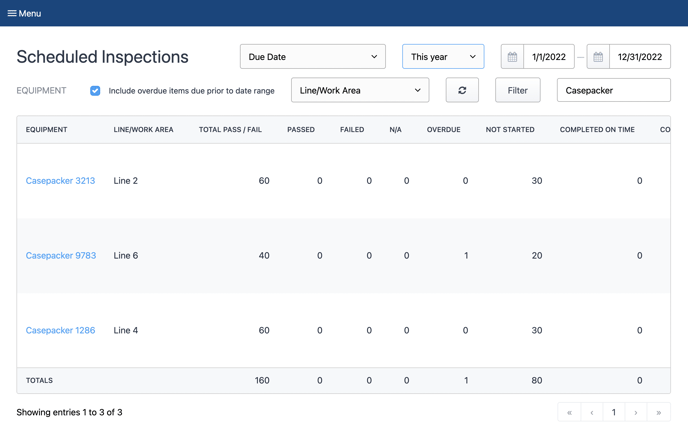
Our clients schedule hundreds of inspection forms with Weever. Not every inspection, however, is relevant to every employee. You can use the filter tools to configure the Scheduled Inspections page to be exactly what you need. Here are all the different ways you can customize this page:
The filters you choose will be saved on the Scheduled Inspections page making this a custom view for the logged in user. If you navigate away and the back to this page, your filters will still be applied.
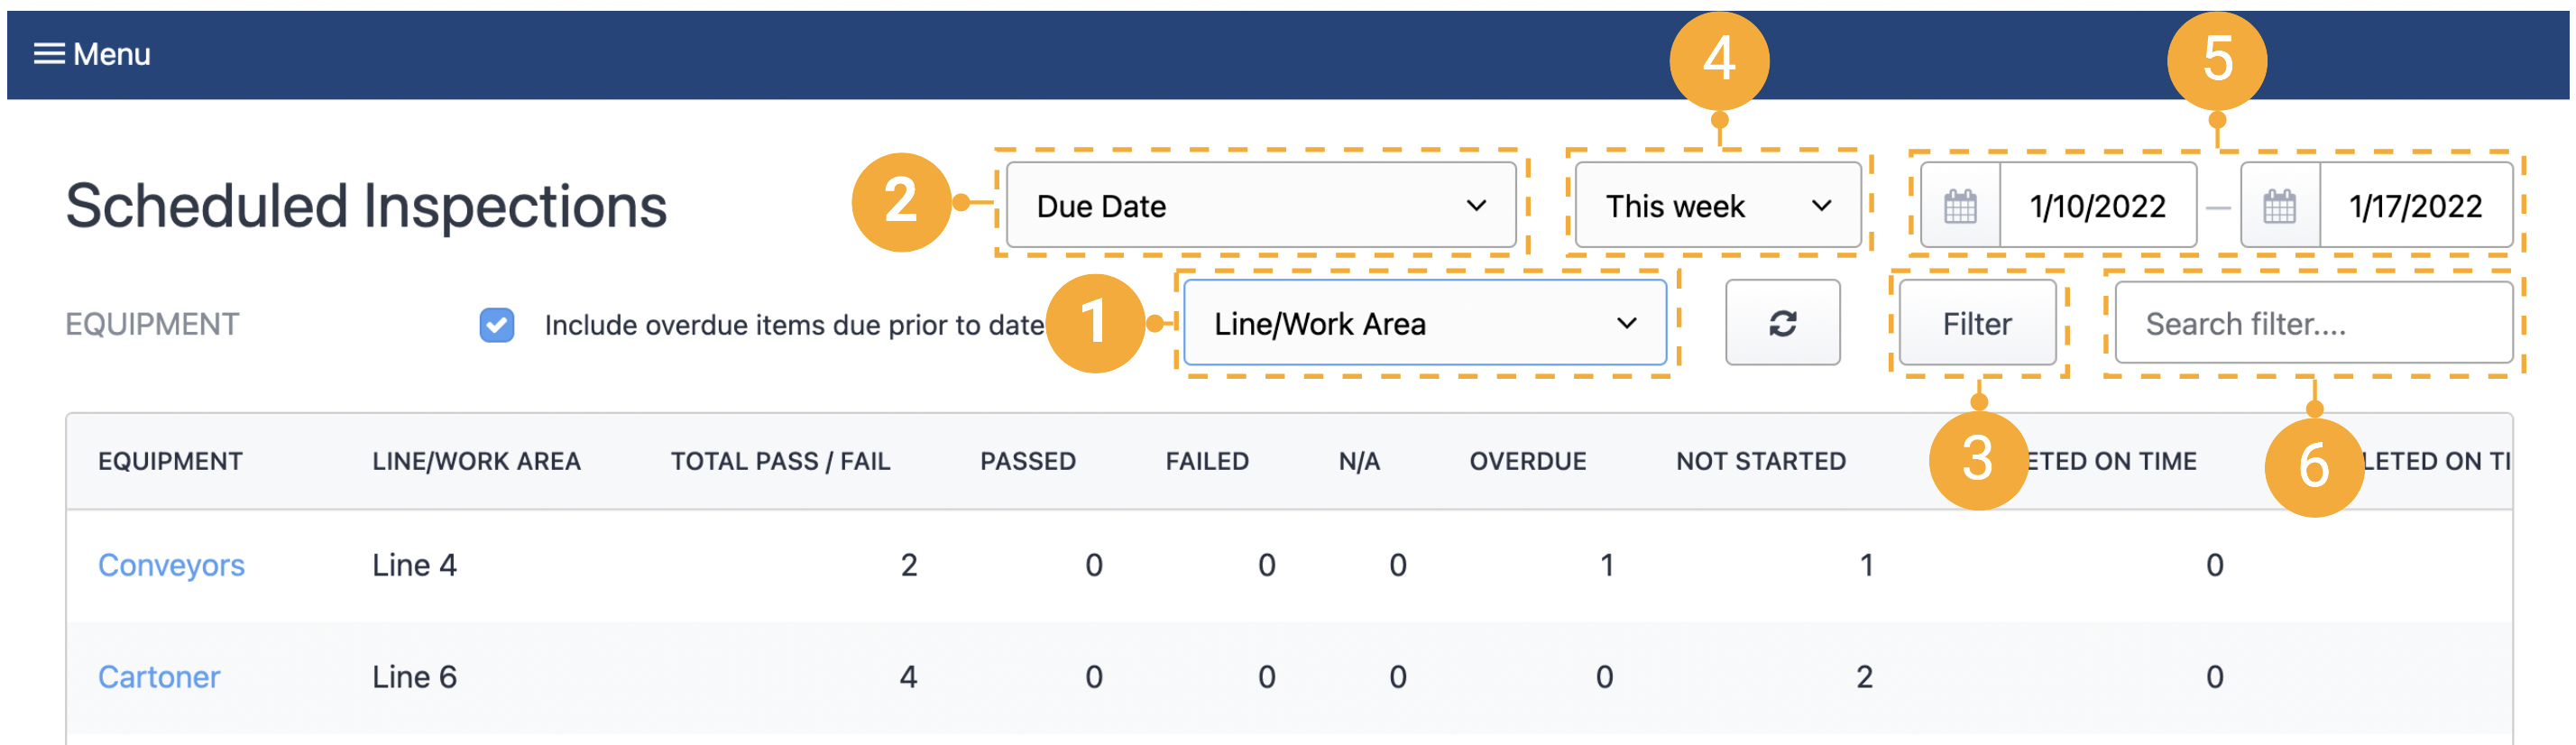
1. Choose how to group inspections
Use this dropdown to change how the inspections are being grouped. The different options are:
- By Line/Work Area - This is the most common choice. Inspections are grouped by machines. This is handy for an operator who is working on a specific line or machine for the day.
- Inspections by person - This groups inspections by the assignee. This is handy for managers to ensure that work has been distributed fairly.
- Inspections assigned to me - This shows a flat list of all inspections assigned to the logged in user. This is handy for operators to get a sense of all the inspections they need to complete regardless of line or machine.
- All inspections - This shows a flat list of all inspections in the system (within the selected date range) regardless of assignee, line, or machine.
2. Choose the date(s) included in the date range
Choose to include the due date, completed date, or both in the query.
- Due Date - use this selection to filter the inspections that are due within the selected date range. This is used to see the inspections that are due without having to scroll through inspections that were due outside of the range, but completed in the range.
- Completed Date - use this selection to filter the inspection that were completed within the selected date range. This is used to show the inspections your staff completed within the range regardless of when the inspection was due.
- Due Date or Completed Date - use this selection to filter the inspections that were due within the selected date range as well as the inspections that were completed within the selected date range. This is used to give an overview of all the inspections being worked on within the selected date range.
3. Filter Panel
Tap the Filter button to open the filter panel. In this panel you can select the status, shift, inspection type, line, and equipment. The Scheduled Inspections view will be filtered based on your selections in this panel. This filter panel works in all the different grouping options as well.
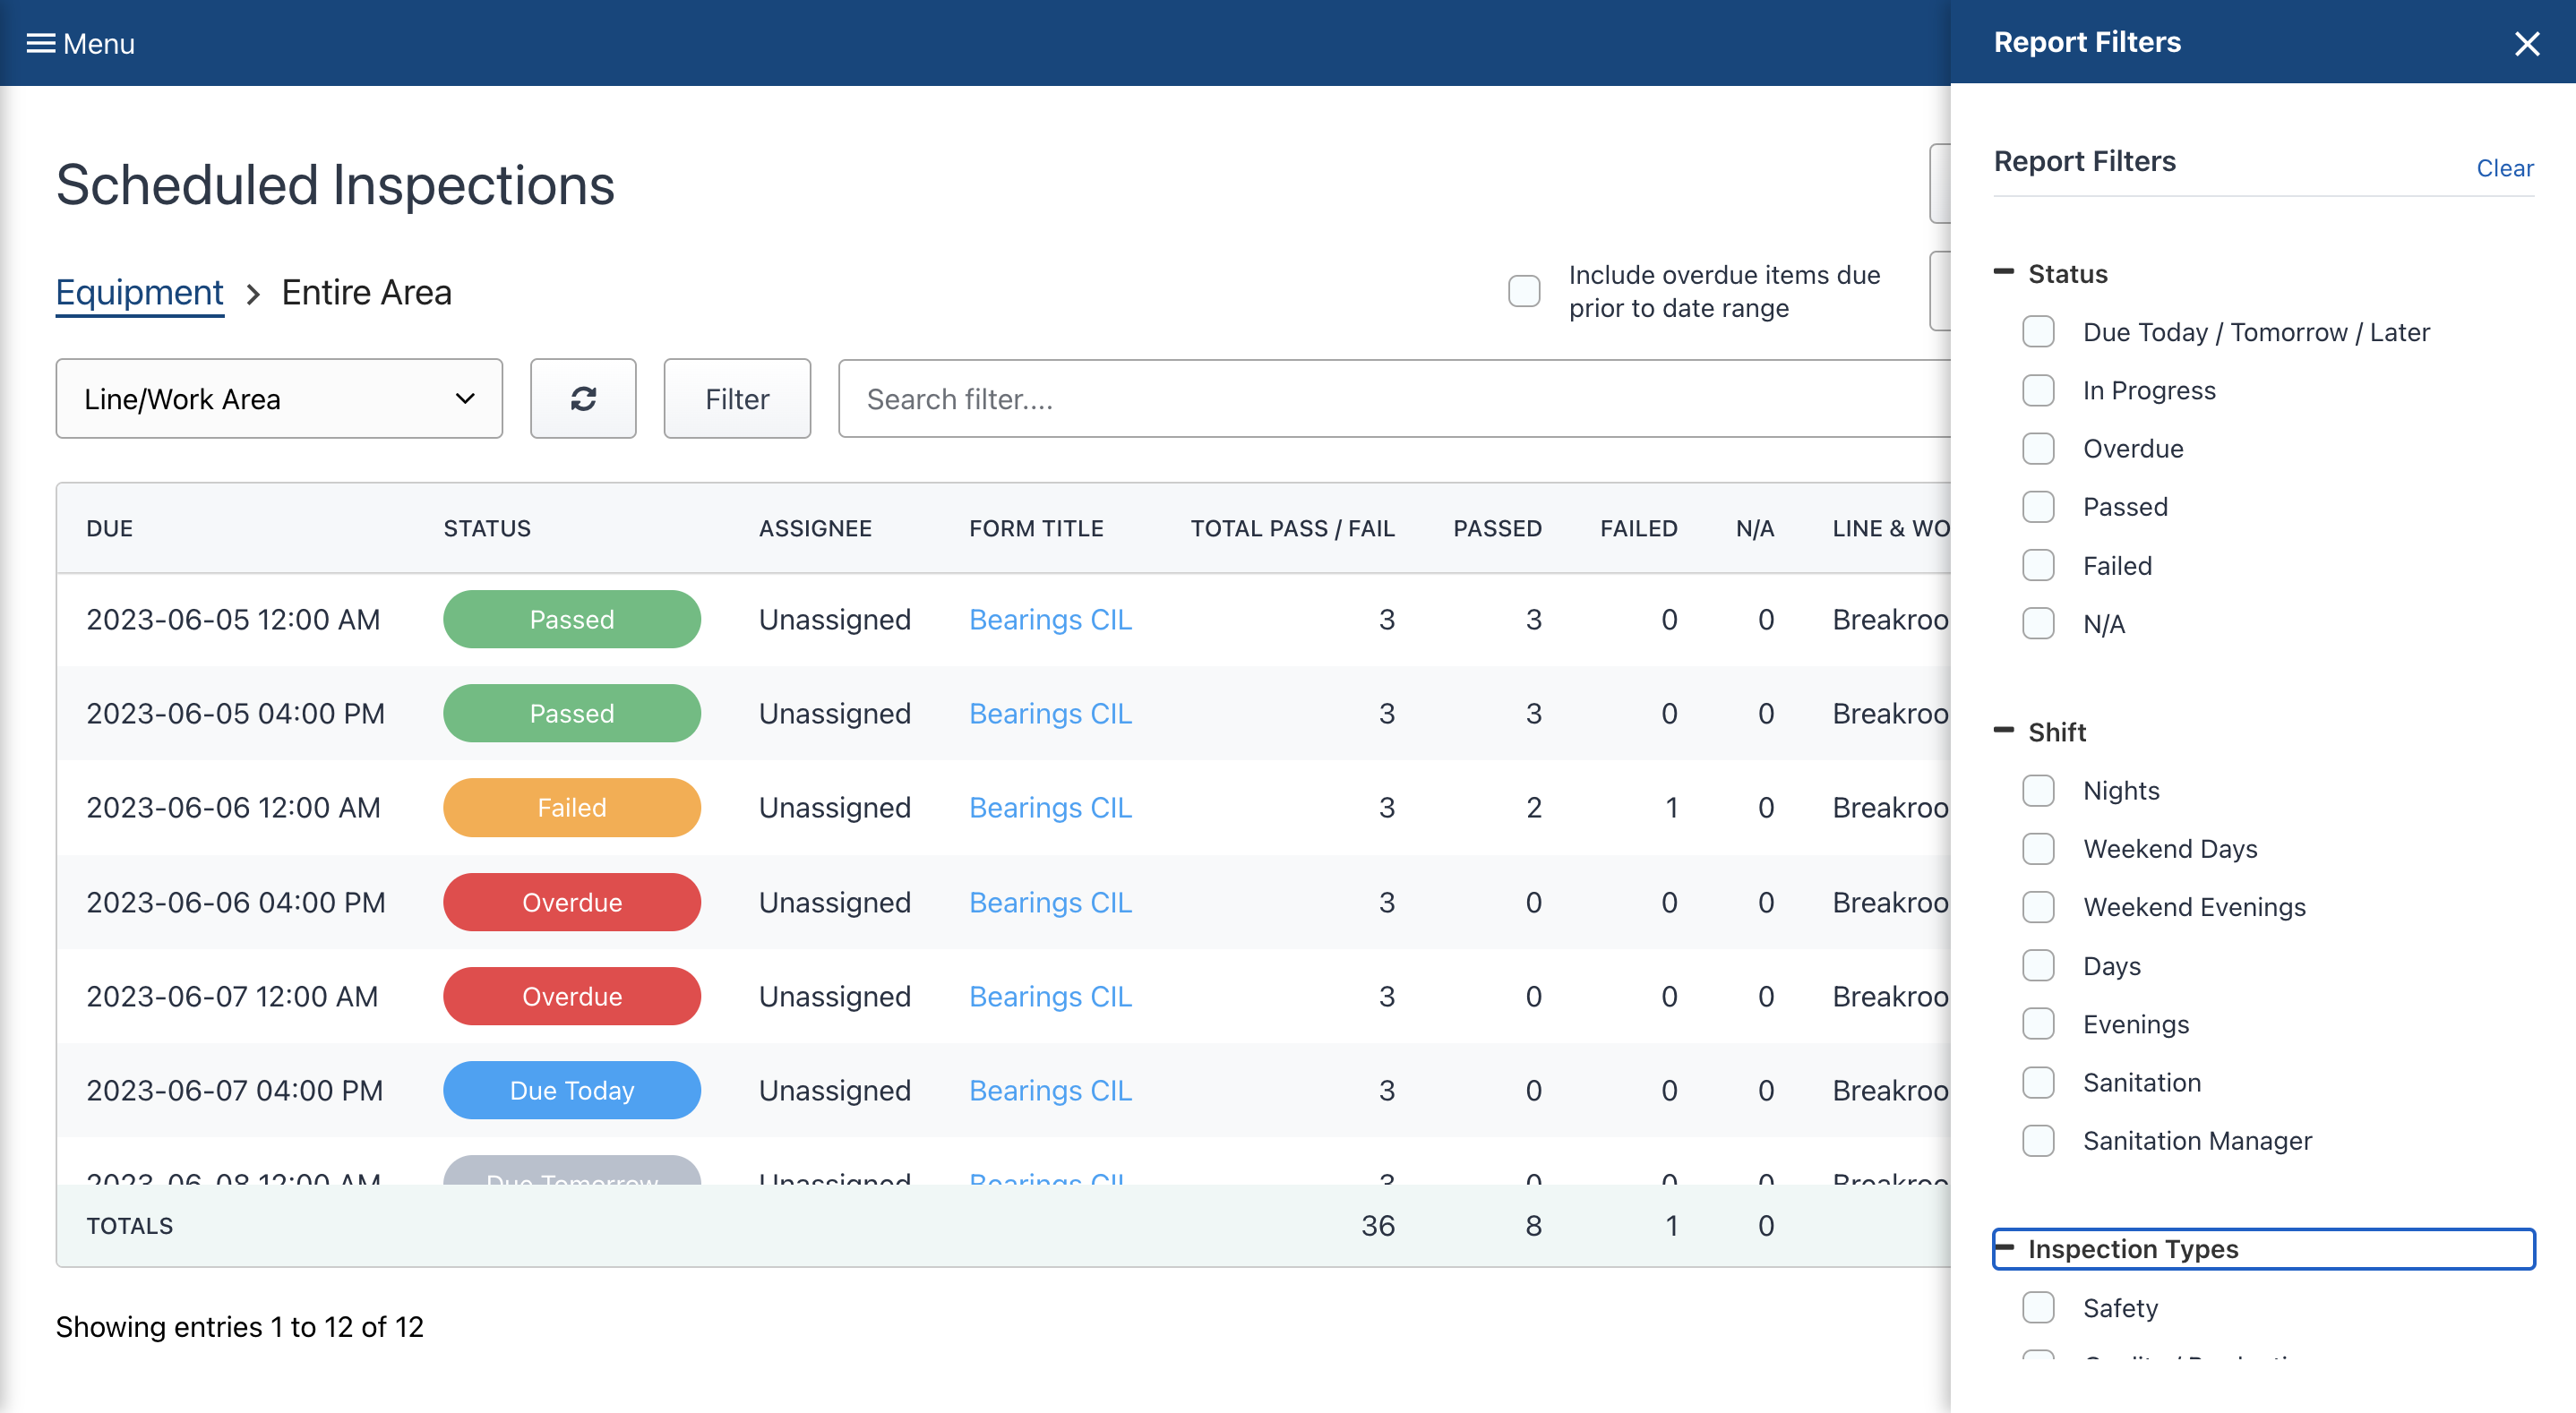
NOTE
The "Status" filter is only available on the bottom level of your hierarchy as well as the "All Inspections" view. This filter is not available on the metrics views.
4. Quick Date Filter
Use this filter to choose from one of the popular date range options like this week, last week, today, yesterday, all time, etc. Use this filter in combination with the Due/Completed dropdown to show the inspections you are looking for. For example, you could get a historical report of your inspection by setting the quick date filter to last week and the Due/Completed dropdown to "Due Date" and you will get a report on last weeks inspection compliance.
5. Date Pickers
Update these date fields to choose the date range you are interested in seeing in Scheduled Inspections. These can be used if the date range you require is not one of the options in the Quick Date Filter.
6. Search field
Use this field to filter inspections by search terms like machine type, inspection name, etc.